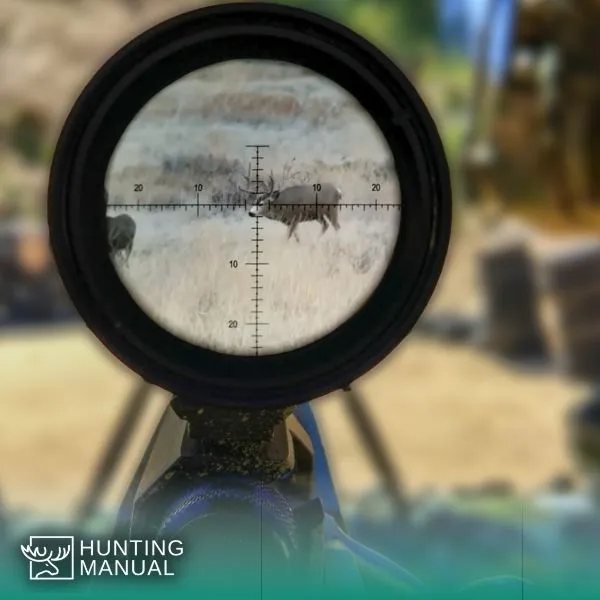
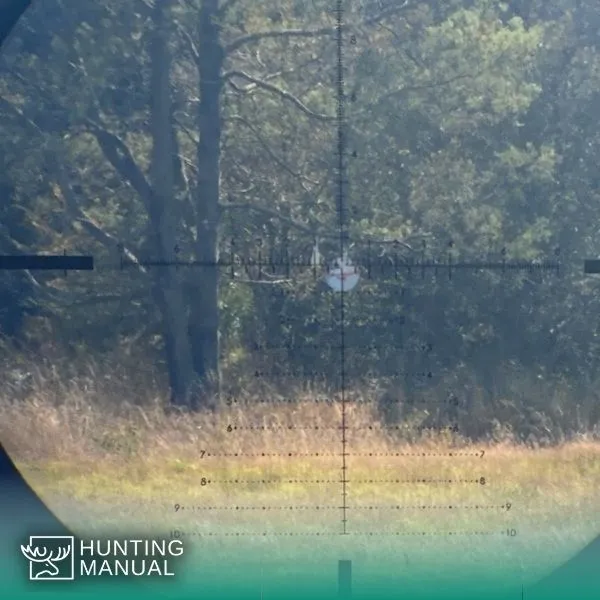
Using a rangefinder reticle is as easy as reading a graphical scale but, if you are weak at maths, we are here to help you. In this article, we will guide you through the methods for how to use a rangefinder reticle along with the other important things associated with it. The sole purpose of the rangefinder reticle is to tell you an estimate of the separation in figures between the point of aim to the target.
What is The Reticle On a Scope?
When you look through your rifle scope, you will see one vertical line and a few horizontal lines with varying thickness, and at a certain distance from each other, these lines are known as the reticle. The thickness and distance of these lines play the most crucial role in distance estimation.
Do you ever wonder how to estimate distance for shooting? That is where you need a rangefinder reticle. It works at an easy to understand principle, and all you need is some basic maths skills to evaluate the range.

Whatever your target is, when you place the horizontal lines of the reticle on your target of known size or height, you can figure out the distance. This will be done by adjusting and aligning the lines to the point of aim, doing some calculations, and finally, getting the estimation of the range.
Ways To Measure The Range For Shooting
There are multiple ways of using a rangefinder reticle to determine the range between the shooter and the target. So, without any further ado, let’s learn how to estimate range using different ways.
By Using the Range Formula
The first thing you need to do is determine your scope’s magnification as soon as you look at your target. For instance, a 3-10x scope will have magnifications from 3x to 10x. At the 10x setting, your scope will have the power of 10.
Now, you must know the size or height of your target in inches. Let’s assume your target is a deer measuring around 6 feet tall and fits into the 6 increments in your reticle at a certain point. Let’s call this point “P”. Each increment of “P” measures 1 foot long at the target. Hence, when converted to inches, that “P” equals 12 inches.
Finally, put all the values into the range estimation formula and get the distance between you and your target. Here is how you can calculate it:
Scope Power x Point “P” x 2.5 = Distance (in yards).
Taking values from the example, 10 x 12 x 2.5 = 300
Therefore, the shooter and its target are 300 yards away.
Range Estimation Using Minute of Angle (MOA)
MOA is abbreviated for Minute Of Angle and refers to the minute-hand of a clock (360-degree). In the MOA, every minute correlates to the 1/60th of a degree. This degree measurement is extensively important while shooting because even the slightest difference in the angle can lead to an inaccurate shot and high chances of missing the target. Therefore, you must carefully calibrate your MOA to the “precise” angles.
As a general rule, the low MOA ratings are much more accurate for long-range shootings. As mentioned earlier, there is a vertical line on the reticle as well which represents everything for an MOA. Just like horizontal lines, the vertical line also has increments but is limited to only two of them. These MOA increments are no more than approximately 2 inches each at 100 yds.
These vertical lines determine a variety of things including the range, bullet drop compensation with high accuracy, and multiple zero points. MOA range estimation can easily be done regardless of your target’s size and height by using the following moa range estimation formula:
Target size (in inches) / MOA x 100 = Range (in yards)
Suppose, your target is a deer measuring 18 inches tall which corresponds to 6 MOA on your scope reticle. Whereas, the distance between you and your target is around 240 yards. By putting the values in the formula, you can easily measure the MOA.
18 / 6 MOA x 100 = 300
After you have determined the MOA range, you need to manually select the hold point depending on your cartridge’s bullet drop. In this way, you can easily split the vertical lines into 1 MOA increments. This will enhance the overall accuracy of the reticle, especially for long range shootings.
If you find it difficult to calculate ranges manually, you may not know what is rangefinder. It will save a lot of your time and minimize your effort.

Range Estimation Using MIL
MIL stands for milliradian which measures an angle in a circle. To get an in depth explanation of how MIL works, some trigonometry will be required. So, we will put it for you in an easier way; MIL is the unit of the angle measured within a circle and it is based on the US military variation.
As you look into your scope reticle, you will notice hash marks and dots along the crosshairs. At a distance of 100 yds (common distance while using a shooting or hunting rifle) the distance between the center of dots on the MIL-Dot reticle scope is approximately 3.6 inches or 1 MIL. This means, that if you fire the bullet, it will hit 3.6 inches higher than your target. So, don’t forget to make the adjustments.
You can estimate the range by using the following MIL ranging formula:
Target size (in inches) x 27.778 / MIL size = Range (in yards)
If your target is a Prairie Dog that is 10 inches high, measures 1 MIL on the reticle, and the range is 300 yards, you can easily calculate the MIL.
10 x 27.778 / 1 MIL = 300
How to Use Rangefinder Reticle
In this section, we have explained three simple steps to guide you on how to use a rangefinder reticle. Let’s read them all out.
- Measure your target size
The foremost thing as you see your target is to determine its size in inches. For deer hunting, chest measures roughly 18 inches then, you will use this figure as its size. However, if you are targeting a fence that measures around 2.5 feet from the ground, make sure to convert it to inches before doing anything else.
Remember: No matter what your target is and in which unit it is measured, you have to convert it to inches.
- Find the range
Here is when you will be required to do the math yourself using either of the three aforementioned methods.
- Choose the right hash mark on your reticle
If the range that you’ve determined corresponds to the 4th hash mark on your reticle, the 4th hash mark must be your aiming point while shooting. It is as simple as that. Just carefully look for the right hash mark, make the adjustments to your reticle, and FIRE!
Conclusion
Knowing how to use a rangefinder reticle improves precision and accuracy of hunters and makes shooting easy. All you need to do is to understand a few easy tips to learn how to use a rangefinder reticle. However, one of the most important things is to practice various sized targets in the range.
If you find it difficult to calculate range using MIL and MOA formula, simply buy a best hunting rangefinder. All of our hunting crew use one of rangefinder units. Practice shooting with your scope’s rangefinder reticle as much as you can. You will know how to read the markings of it and hunt game animals with confidence.
Knowing how to estimate distance for shooting will make you the most accurate shooter who never shies away from hitting the shot regardless of the distance. We hope that our article helped you understand the basics and by now.

Leave a Reply